A lot of people have asked for Ed's changes made to Sharp Practice 2 for his Rorke's Drift game. Figured we could upload them here on the blog, feel free to use them for your own Zulu War games!
Rules Changes
Firing and Movement Random event tables


A lot of people have asked for Ed's changes made to Sharp Practice 2 for his Rorke's Drift game. Figured we could upload them here on the blog, feel free to use them for your own Zulu War games!
Chitown Wargamers will hosting a 28mm open ADLG Tournament at Adepticon '23. The convention is being held at the Renaissance Schaumburg Convention Center, Schaumburg, Illinois.
The event will be located at the nearby Hyatt Regency (where the historical events are generally held). We have space reserved for 12 players max. You need to register online thru the convention organizers starting January 8.
Any 200-point list from 4th edition of the rules are fine. 2 versions of each list allowed. BYO mat and terrain. Tournament will run from 9AM-7PM is three 2.5-hour rounds.
If there is enough interest, we hope to grow this event in future years and perhaps include a 15mm tournament as well.
If you have any questions, contact me at a_gonatas@ameritech.net.
Mark

For something a little different, we have a Bolt Action tournament AAR. This was held on Saturday November 5th. The venue is a game store in Chicago called Dice Dojo located on north Broadway in the Edgewater neighborhood. The main floor is composed of open gaming tables on one side and retail space on the other mostly featuring board games and collectible card games. The tournament itself was held in the basement. They have around a dozen 4 x 6 tables and an absolutely staggering amount of community terrain and miniatures along the walls.
The tournament itself was an escalation format. That means each round was more points than the previous round. It was 3 rounds at 450, 750 and 1000 points. This format has a few advantages. The first is an overall shorter tournament. First game was at 10am and we were done by 6pm. The "standard" sized game is typically between 1,000 and 1,250.


Take a look around you boy, it's bound to scare you, boy
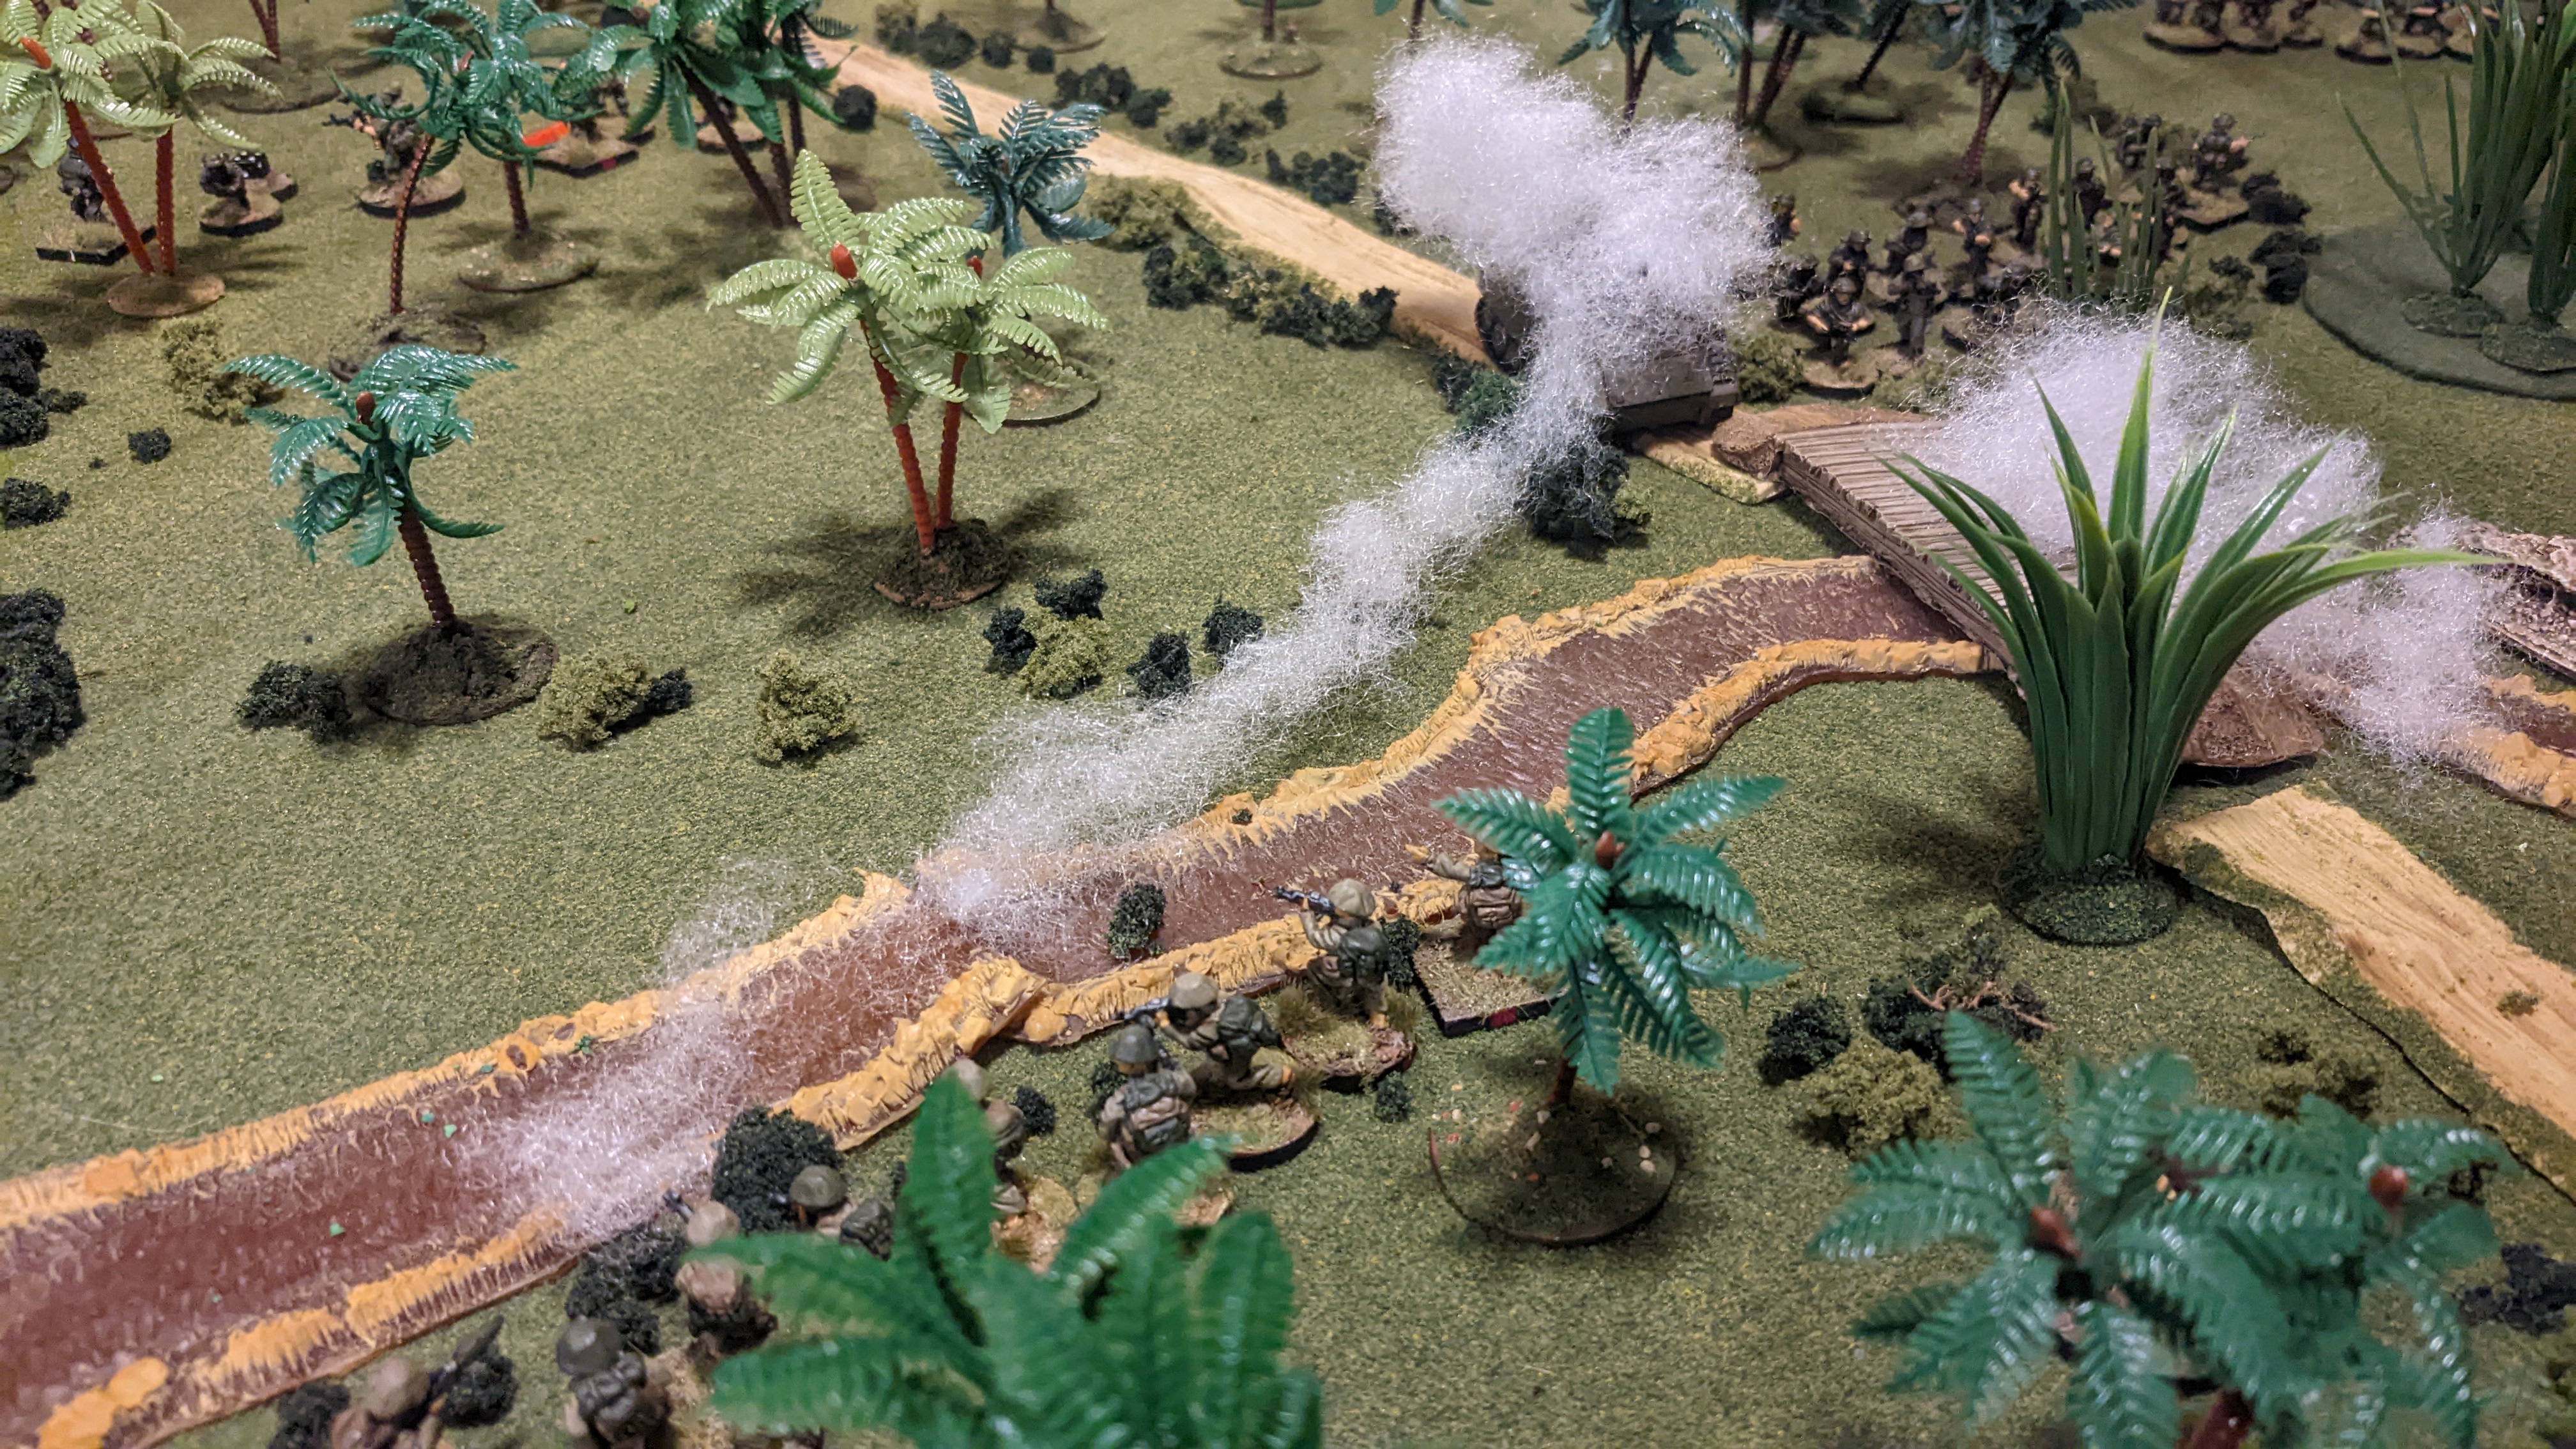
Ed, Chris and I broke out my old 20mm Vietnam collection to give Chain of Command: DMZ Second Tour another go.
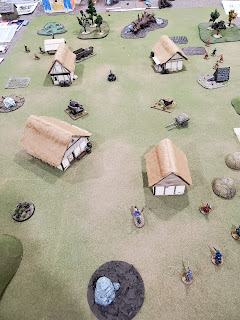
We used the "Going With a Bang" scenario from the Blitzkreig: 1940 supplement by TooFatLardies - a platoon of US Marines was tasked with capturing a bridge and strong point before withdrawing PAVN forces could destroy them.
 |
Chris and I took command of the USMC and took two M60 teams and a M113 as support options. The rules allow for the US to embed the M60 LMGs into existing squads, so we beefed up two of our three squads with the extra firepower (bringing their collective base fire to 24 dice within 12").
Ed's PAVN forces came with a sapper team tasked with blowing the objectives, a Political Cadre senior leader, MMG team in a bunker, extra RPG team and a pre-planned ambush.
Additionally Ed picked up the "Local Knowledge" trait for the PAVN, which gives their patrol markers a 14" move distance and allows them to be 14" apart, opposed to the base 12". This made a huge difference as it allowed him to stop our jump-off points from being further up the table.
 |
| Marines deploy while Ed observes their advance |
Quickly Chris' first squad deployed on the right, intent on pushing towards the bridge. Ed countered with a squad of PAVN regulars, descending into a jungle firefight with both sides saving well. Eventually Ed decided to fall back into the jungle as his sappers were able to blow the bridge early on.
 |
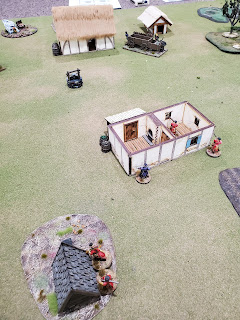
| PAVN squad deploys to slow the Marine advance |
 |
| Sappers set their charges on the bridge |
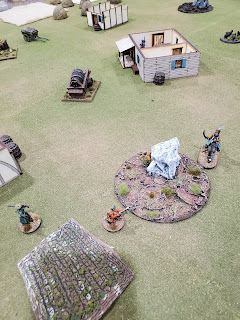
My Marine sections, supported by the M113 advanced slower up the left side, until we reached an open field and decided to book it across. At this moment, Ed deployed his MMG team in a bunker using his pre-planned ambush and slowed us down.
We found the MMG only having seven dice actually wasn't much of a fight for Marines who, including their own attached LMG were throwing 18 dice back at them at effective range. Something we may tweak is the points values of the HMG/MMGs for 'Nam.
The Marines suppressed and cleared the bunker easily, but it took up time that would have been better spent rushing the objective.
 |
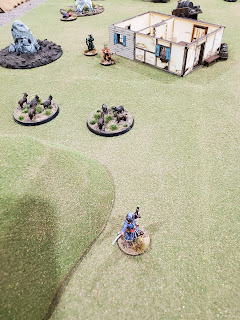
With time running out and Ed's sappers making their way to the second objective, Chris and I decided to run the M113 up the road in the hopes of breaking some PAVN forces. Knowing full well that a RPG (AP of 11) would shred the M113 if hit (Armor of 2).
The M113 exchanged fire with PAVN forces and managed to shrug two hits with RPGs off, but Ed's second squad managed to land the fatal blow with their final RPG shot...
 |
| M113 is smoked by the hero RPG gunner |
As the Americans desperately pushed the riverbank to try and suppress the sappers, the Vietnamese charges went off successfully landing Ed a victory. With the PAVN forces melting away into the jungle the Marines were stuck trying to ford the river.
Special shout out to Chris' Marine squad who took on three PAVN squads and made it through the whole scenario. Starting with 14 men, they ended the game with four.
Looking forward to continuing to use 'Nam stuff that I had painted for Arc of Fire years ago, as the CoC: DMZ works very well overall.

 |
| Final dispositions of forces |
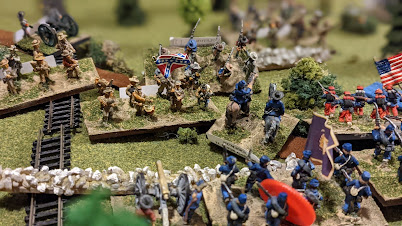
This past week, myself, Chris, Ed and Mark got together to re-fight Seven Pines/Fair Oaks from the Peninsular Campaign. We used Altar of Freedom, a brigade-level ruleset intended to be used for big battles, we've been using this recently and it is definitely rewarding to play an entire battle in a 3-4 hour span. In the case of Seven Pines we got through both days, May 31st and June 1st of fighting.
Mark took the reins as the Union commander, Brig. Gen. Heintzelman with myself acting as Brig. Gen. Sumner, arriving to support his Corps.
The Confederates were run by Ed as Gen. Joe Johnston and Chris handling Maj. Gen. Longstreets corps that started on table leading the attack.
Although Altar of Freedom always for ahisotrical deployments, we kept to a general historical deployment of forces to see how it would play out.
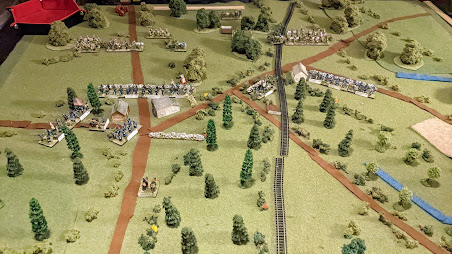 |
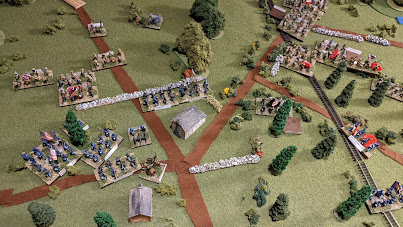
| Beginning of May 31st, 1862 |
Heintzleman and Keyes' Corps deployed on table to begin with Casey and Couch's Division forming the front rank of defenses and Kearney's division beginning in reserve, quickly deploying to the Union left in anticipation of a Confederate attack.
In Altar of Freedom Generals have traits tied to their historical performance, in Longstreet's case he risked not activating on any given turn with a Roll of '1', when the battle stepped off at 1 PM, Longstreet blinked and failed to advance. This allowed the Union forces to begin to dig in and adjust their line.
 | |
| Anderson's division advances on the Union right |
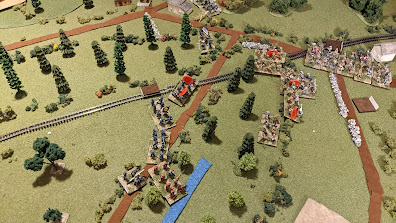
Throughout the first day of fighting the Confederates focused their attack on the Union left, guarded by a Couch's division of Keye's command, stationed near Fair Oaks station. Numbering three brigades and a battery of guns, the Confederate division under Anderson had six brigades and a battery operating against them.
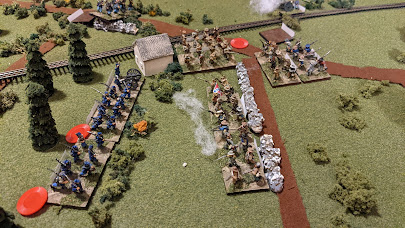 |
| Anderson smashes through Couch's line |
While the Union left remained relatively quiet in the opening hours, Anderson decisively smashed through Couch's division, routing one brigade and throwing back two more.
 |
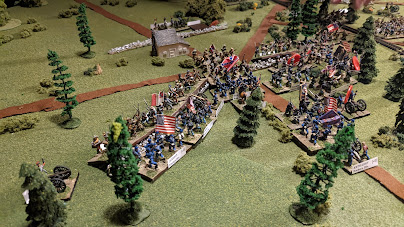
| Sedgwick's Division arrives |
By 4 PM on the 31st, Sedgwick's divsion had arrived on the Union right and began to deploy in support, this forced the Confederates to pause their assault. Meanwhile, Johnston arrived on table alongside Gustavus Smith's Corps.
 |
| D.H. Hills' Division comes to life |
Knowing their time is running out on the first day, Longstreet decides to finally send D.H. Hill's division forward against Casey's division around Seven Pines. A brutal fight for the Union breastworks follows with the Rebs being able to push the Union back before nightfall.
During the night phase, the Union shore up their line, and Hooker's division arrives in support of Heintzelman while Richardson's division along with Bullhead Sumner arrive on the Union right. Confederate reinforcements during the night is Huger's division under Longstreet, who followed his historical failure to arrive on the first day. They deploy on the Union left, ready to attack at dawn.
 | ||
Confederates renew the assault on June 1st
|
As dawn breaks on June 1st, the Confederate forces launch an all-out assault against the Union left, pushing back Heintzelman's division and almost killing Heintzleman multiple times! Mark rolls well and manages to keep his General alive in two back to back combats.
Meanwhile, Sumner attempts to pressure the Confederate left near Fair Oak's station while they are preoccupied with Seven Pines. His progress is limited and manages to break one Confederate brigade, but a swift counterattack by Chris' forces stops the advance and wounds Sumner causing him to be removed from play.
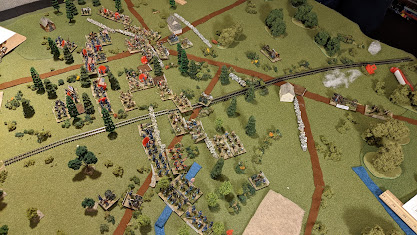 |
| Dispositions at the end June 1st |
Into the afternoon of June 1st, both forces remain locked around Seven Pines and Fair Oaks station. The result of the battle is a Confederate tactical victory, three Union brigades and one artillery battery were broken at a loss of only one Confederate brigade from D.H. Hill's division. Johnston avoided being wounded in our refight, meaning Lee will not be taking command of the Army of Northern Virginia for the time being...
Seeing Little Wars TV tease their Peninsular Campaign series inspired me to put on Seven Pines, and I am hopeful I can get the forces together by this Summer to refight the Seven Days Battles for their 160th Anniversary as well.
Last Friday we got together to do a recreation of the Battle of Culloden to mark the 275th Anniversary. We used Sharp Practice, which took some time for us to remember how to play since we have not done much black powder gaming recently.
 |
| Bonnie Prince Charlie surveys his troops |
 |
| Government forces prepare for the Jacobite charge |
Mark took the role of infamous "Butcher" Cumberland and Myles his lieutenant, the Earl of Albemarle.
The battle opened with the Prince taking the initiative, Jacobites on the left began pushing forward with supporting cannon fire accompanying them.
 |
| Garde Écossaise advances on the left |
 |
| Fire! |
The opening turns favored the Jacobites with initiative draws keeping their advance going. Consistent fire from the Garde Écossaise and artillery pushed back one Government regiment allowing the Jacobite cavalry to advance. Government cavalry pushed into the gap and a melee ensued, the Jacobite cavalry was able to scatter the Government horse, a duel ensued between Lt. Col John Mordaunt and Capt. O'Shea over the King's colors! In the our first ever duel, duel Lt. Col. Mordaunt was able to wound the Jacobite commander and return to his lines with the colors.
 |
| The Duel begins |
 |
| Mordaunt regroups with his survivors, and the colors |
 |
| Lochiel's men fend off a charge |
 |
| But are quickly cut to pieces... |
With much action on the flanks, the Jacobite center finally began to move, surging into the breach as the Government forces were scrambling to secure their flanks. Farquarson and McIntosh managed to get stuck in with two Foot regiments and send them fleeing from the field, but this would be the "High water mark of the Jacobite cause" as more Government forces were able to stop the Jacobites in their tracks and due to losses force them to flee the field.
Both forces had started with 11 morale in order to see if we could go the distance of the scenario, we finished with the Government forces at 4 and the Jacobites at 0. Which would be classified as a Pyrrhic victory for the Government, with the Jacobites coming close at times, just needing an extra line to follow up on their gains.
 |
| Farquarson and McIntosh make the great Highland Charge! |
 |
| Butcher Cumberland throws himself into the Government line to stop the Jacobite advance |
 |
| Bonnie Prince Charlie laments his forces fleeing the field...and plans his escape to France |
 |
| The Jacobites raise a toast to their glorious failure |